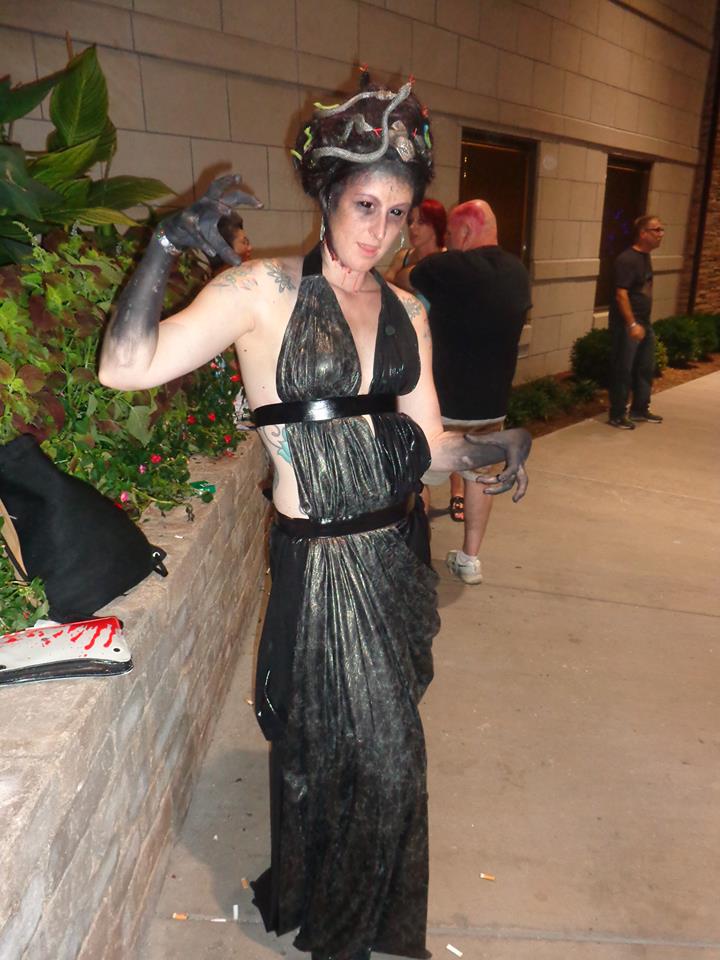
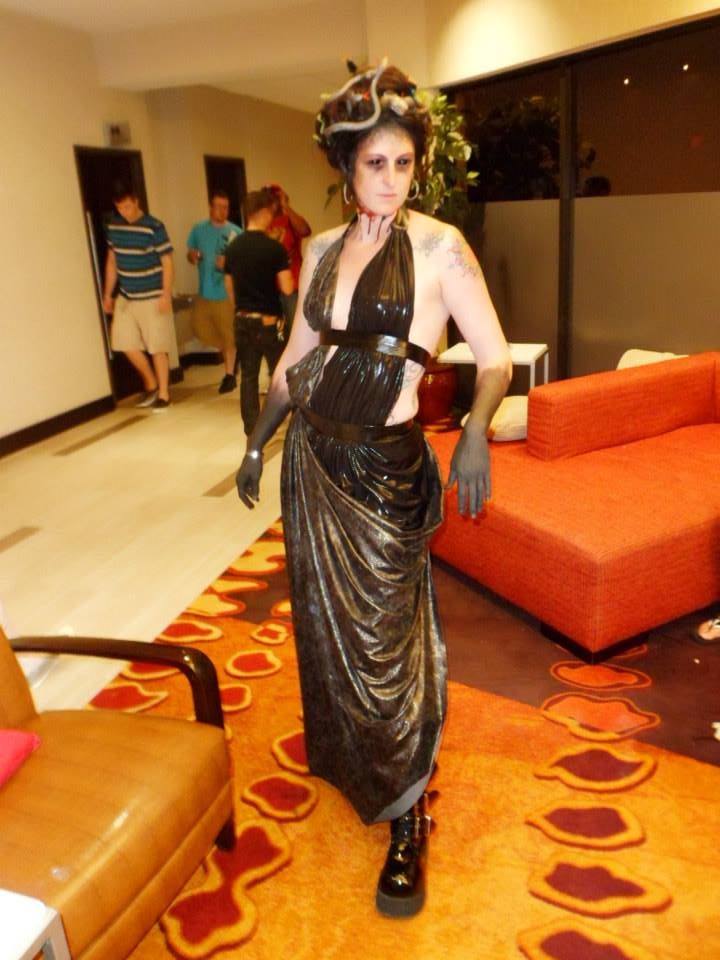
Back in April 2013 my friend Allison asked if I could sew a grecian-style, Medusa-inspired cosplay dress for her to wear to Horrorhound that October. At that time I hadn’t really sewn anything for anyone besides myself. I forewarned her and accepted the challenge. I love cosplay and love making costumes, so I was excited to try my best to make her vision come to life. I asked her to sketch out what she wanted her outfit to look like and I’d start from there. I didn’t use any patterns, just kind of winged it. Here is the sketch:

Allison brought me a few yards of black shimmer dance wear fabric and a few yards of copper faux snakeskin fabric. She also brought some faux leather belting, grommets, 2 belt buckles and bra cups. I took all of her measurements and started trying to figure out the best way to put this garment together.
This was the first time I got to really use my new dress form. I adjusted all of the measurements on the form to mimic Allison and adjusted the height to be the same as her. She’s really tall, so I had to make sure this wasn’t going to be too short! I gotta say, that dress form came in handy for this project!
I don’t really have a great tutorial of how I did things since I mainly just draped everything but I’ll try to describe what I can.
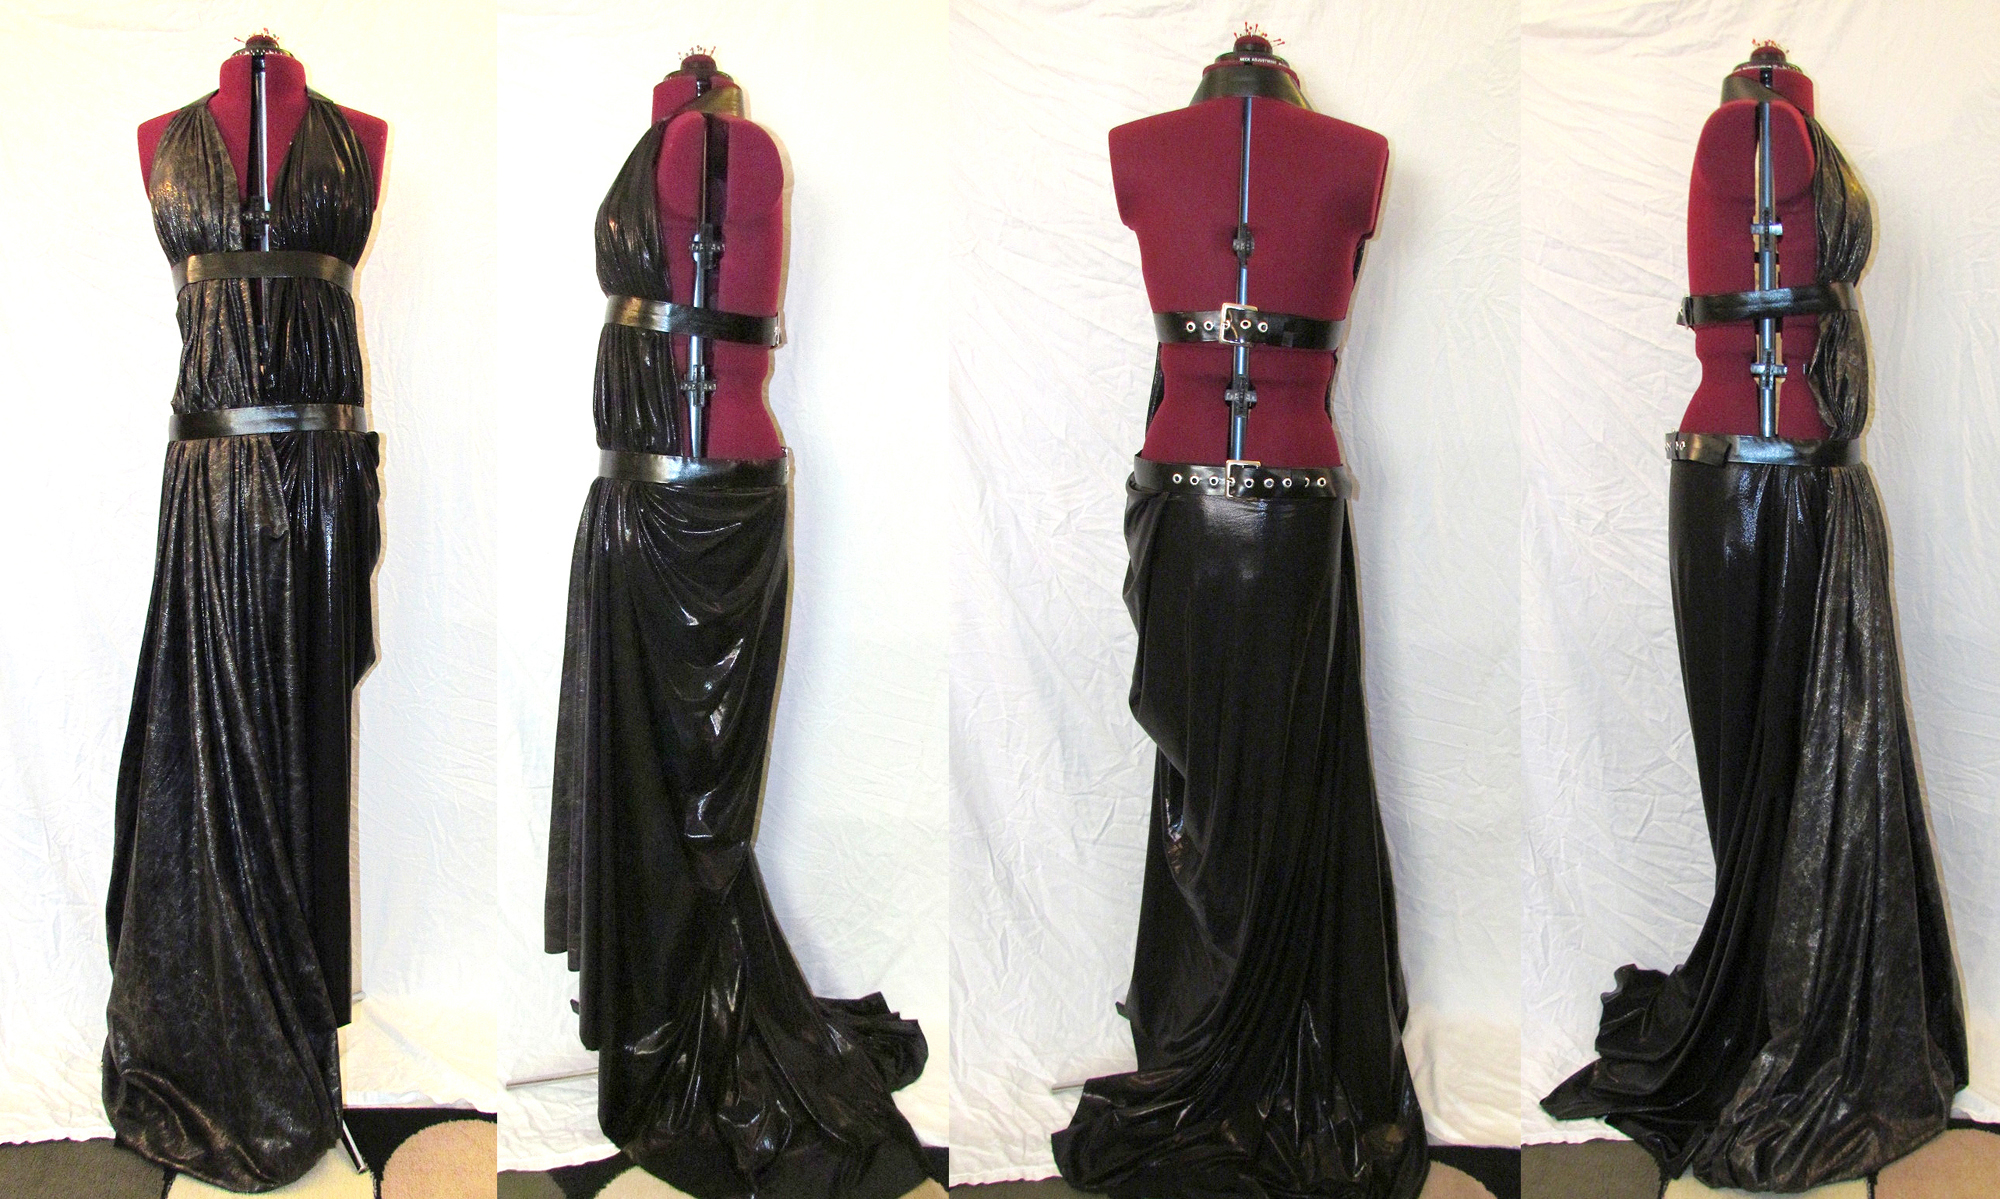
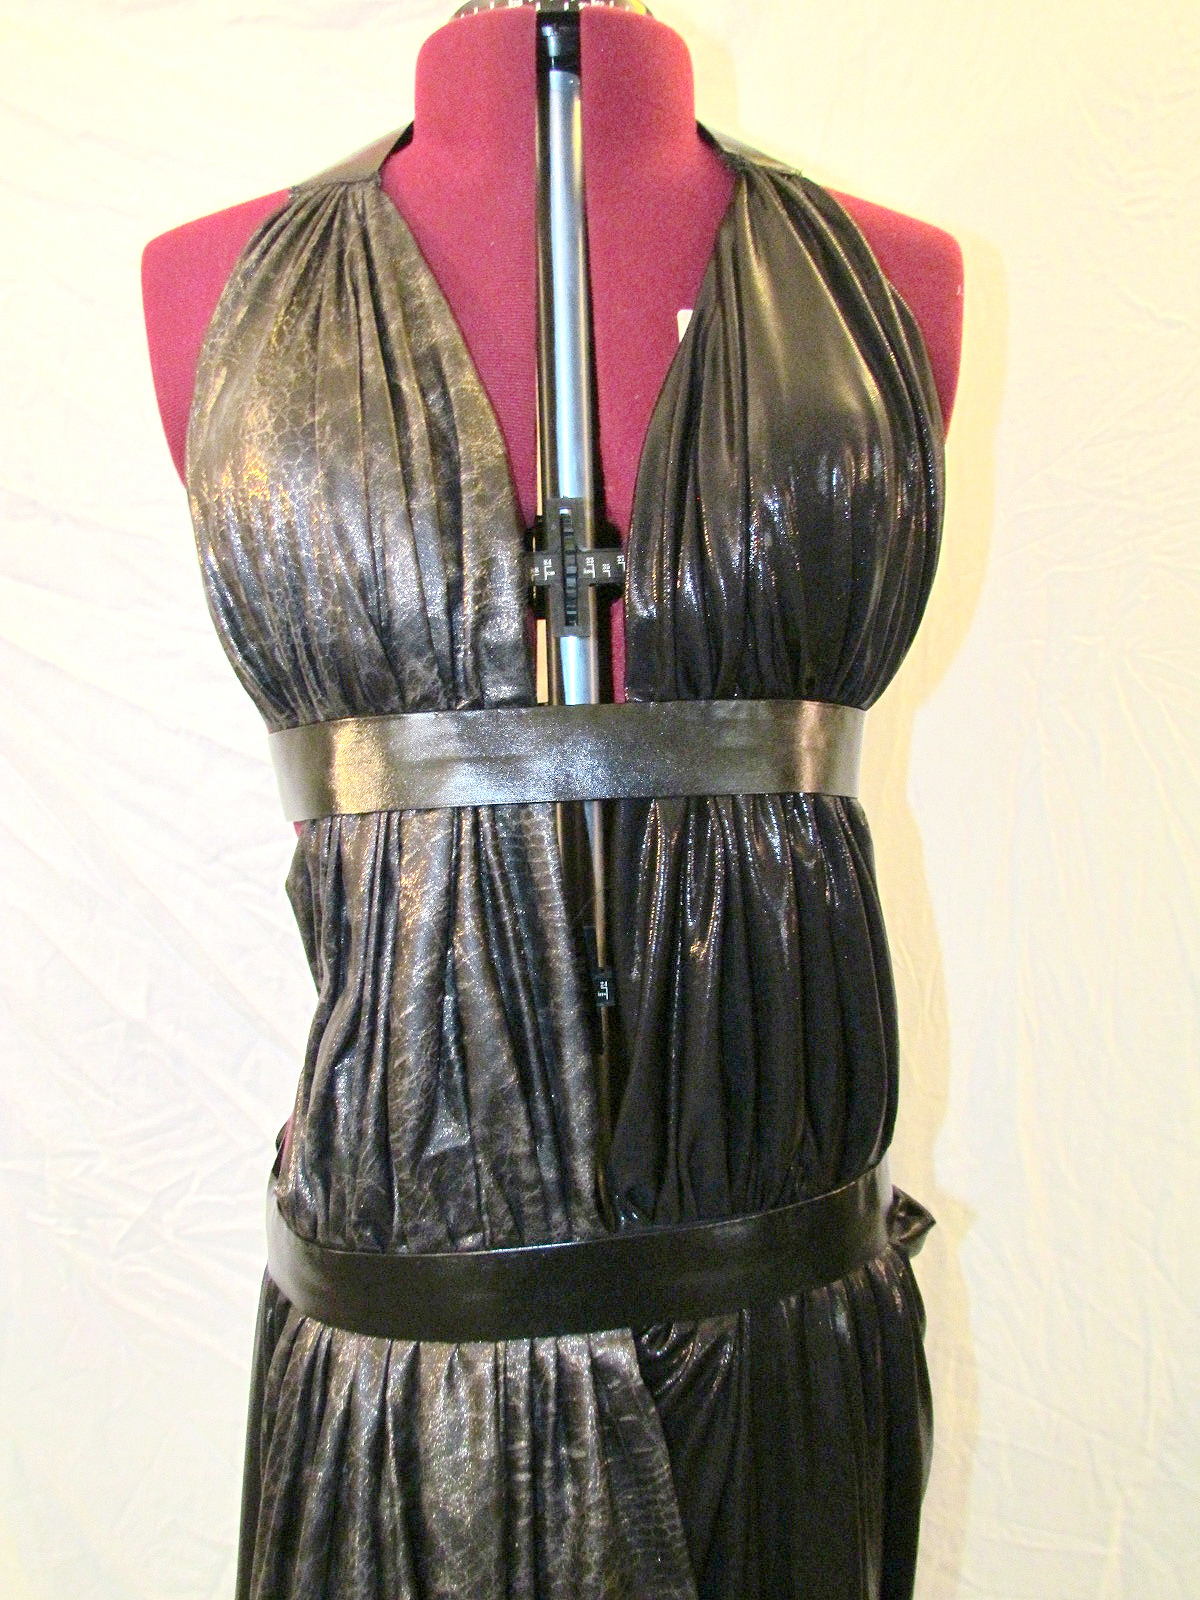
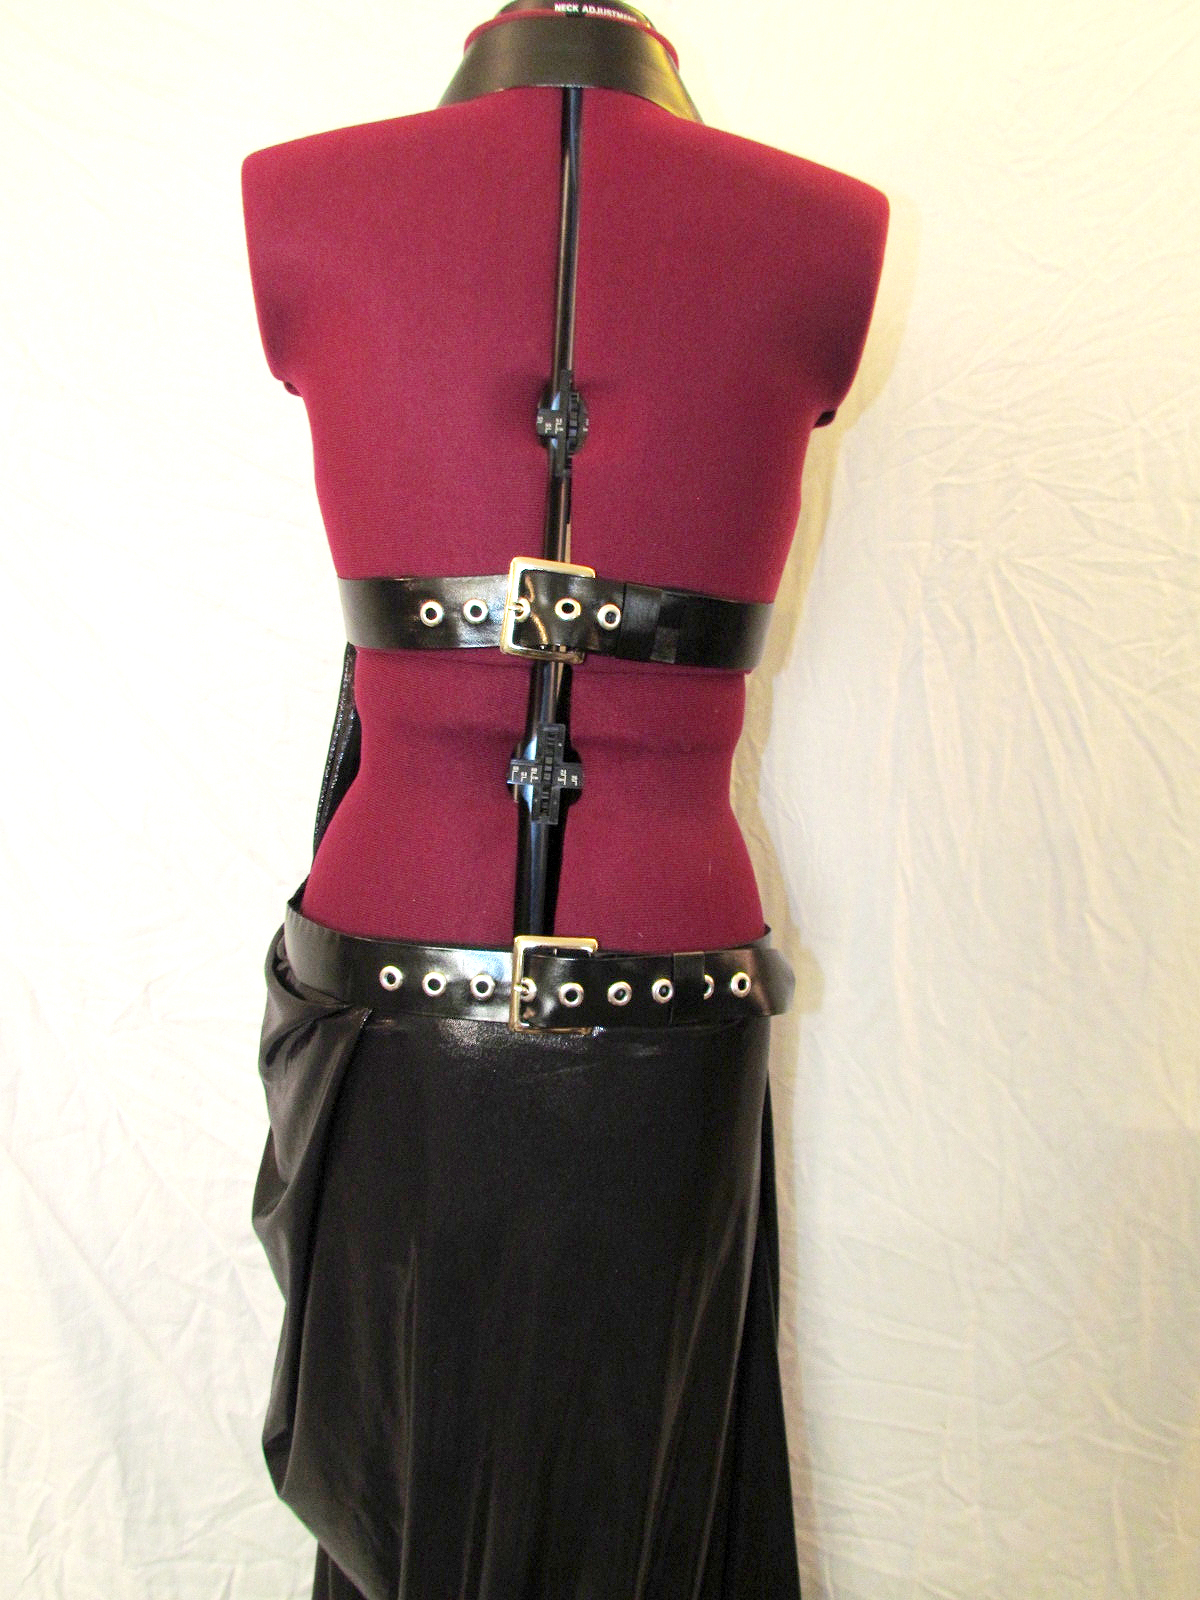
For the bust I just cut out 4 pieces of fabric, each in the shape of a trapezoid. 1 piece was in the black shimmer, 1 piece in faux snakeskin and 2 pieces of plain black fabric for lining. I gathered the top first to be the same width as the faux leather belting and attached it to the belting with right sides together. I used the belting around the back of the neck in the same style as a halter top. This took a couple of fittings since we didn’t want the neck to be adjustable. After that I slid the bra cups up into the bust area and stitched them in from the lining side.

Next I cut strips of plain black fabric to use as mock belting. I did this mainly to be able to sew the mock belting to the actual fabric pieces. I also attached velcro to them for added support underneath the actual belts. To get the leather belts to attach to the mock belting I used fabric glue and hand stitched them to the fabric where you can’t see any stitches.
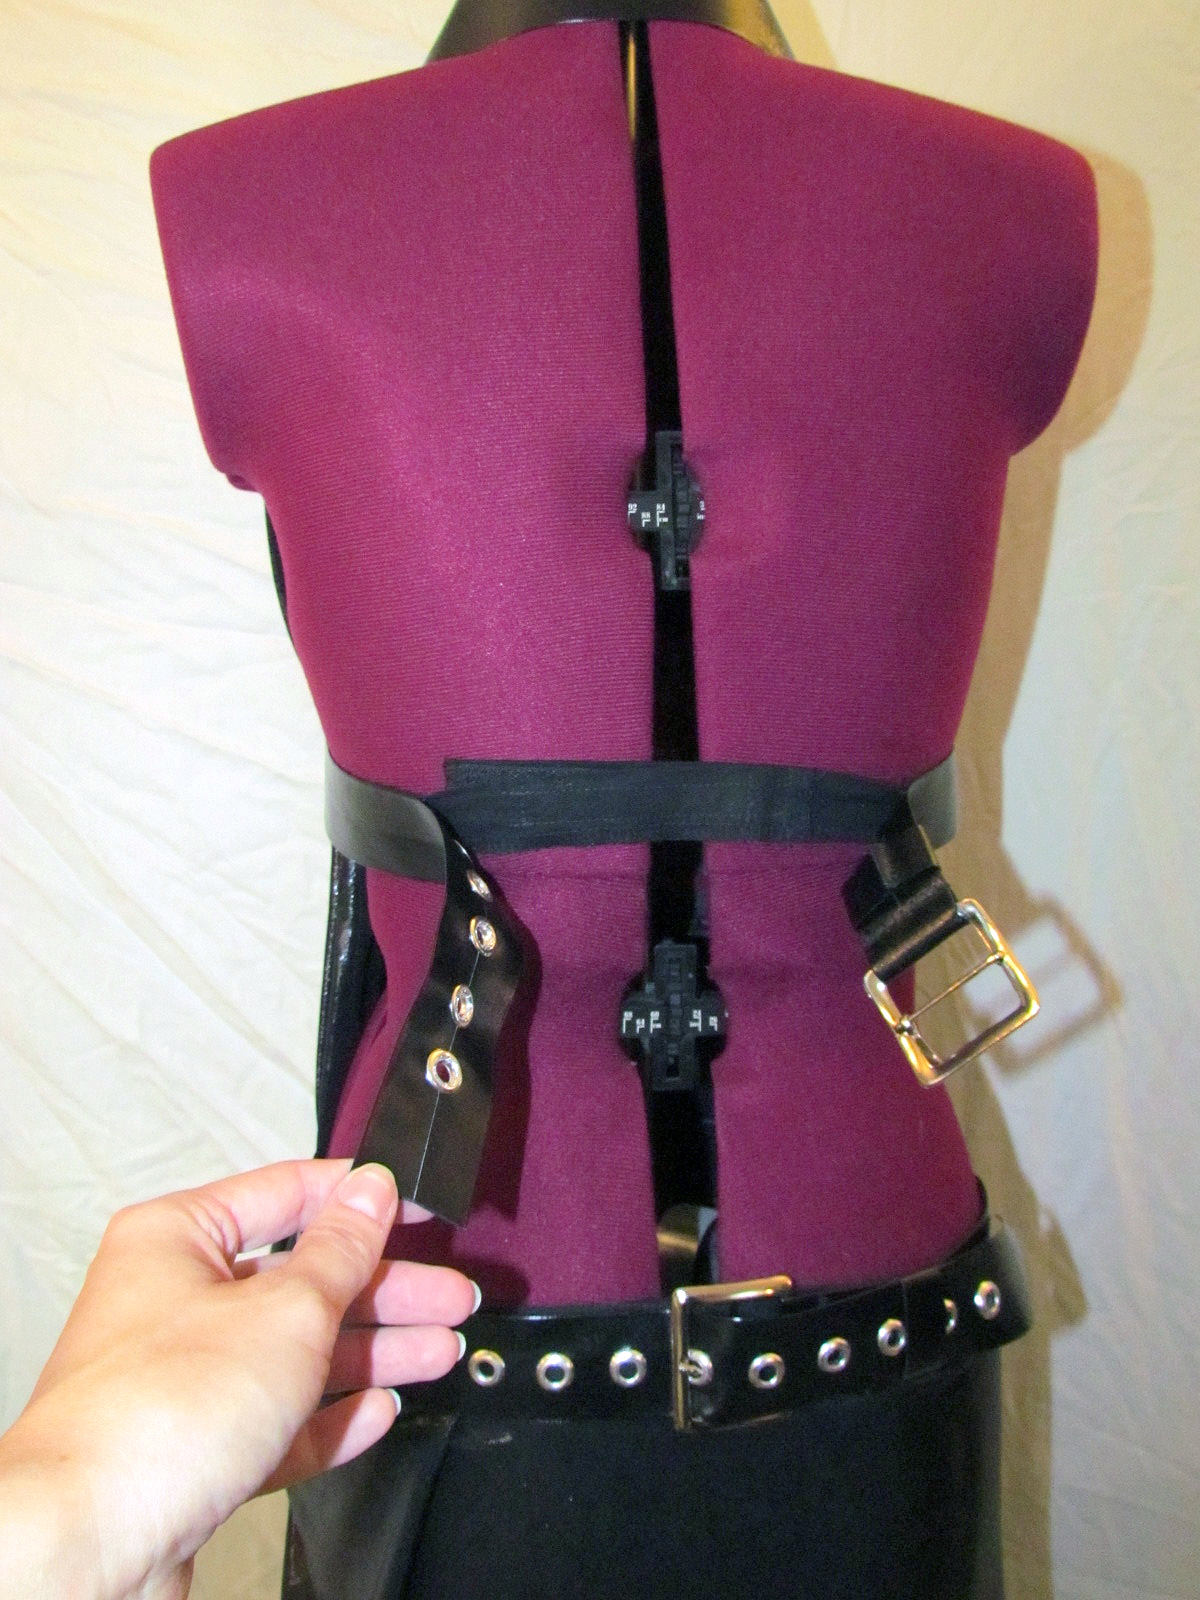
I forgot to mention I make the belts myself by just marking 1″ increments and then I put the grommets in at each marking. Creating a belt yourself is a lot easier than you may think! It did help that this faux leather isn’t too thick and is easy to work with. I believe it was from the Project Runway line at JoAnn Fabrics.
For the rest of the front I cut out 2 rectangles of fabric (1 piece black shimmer and 1 piece faux snakeskin) and then gathered the top to be the same size as the bottom of the bust area. I attached those pieces to the mock belting and then added another mock belt to the waistline.
The waistline was a little trickier because I didn’t know exactly how I was going to do it. I didn’t want to add a zipper because I wanted a nice drape. I came up with this overlapping idea with the velcro and belting:
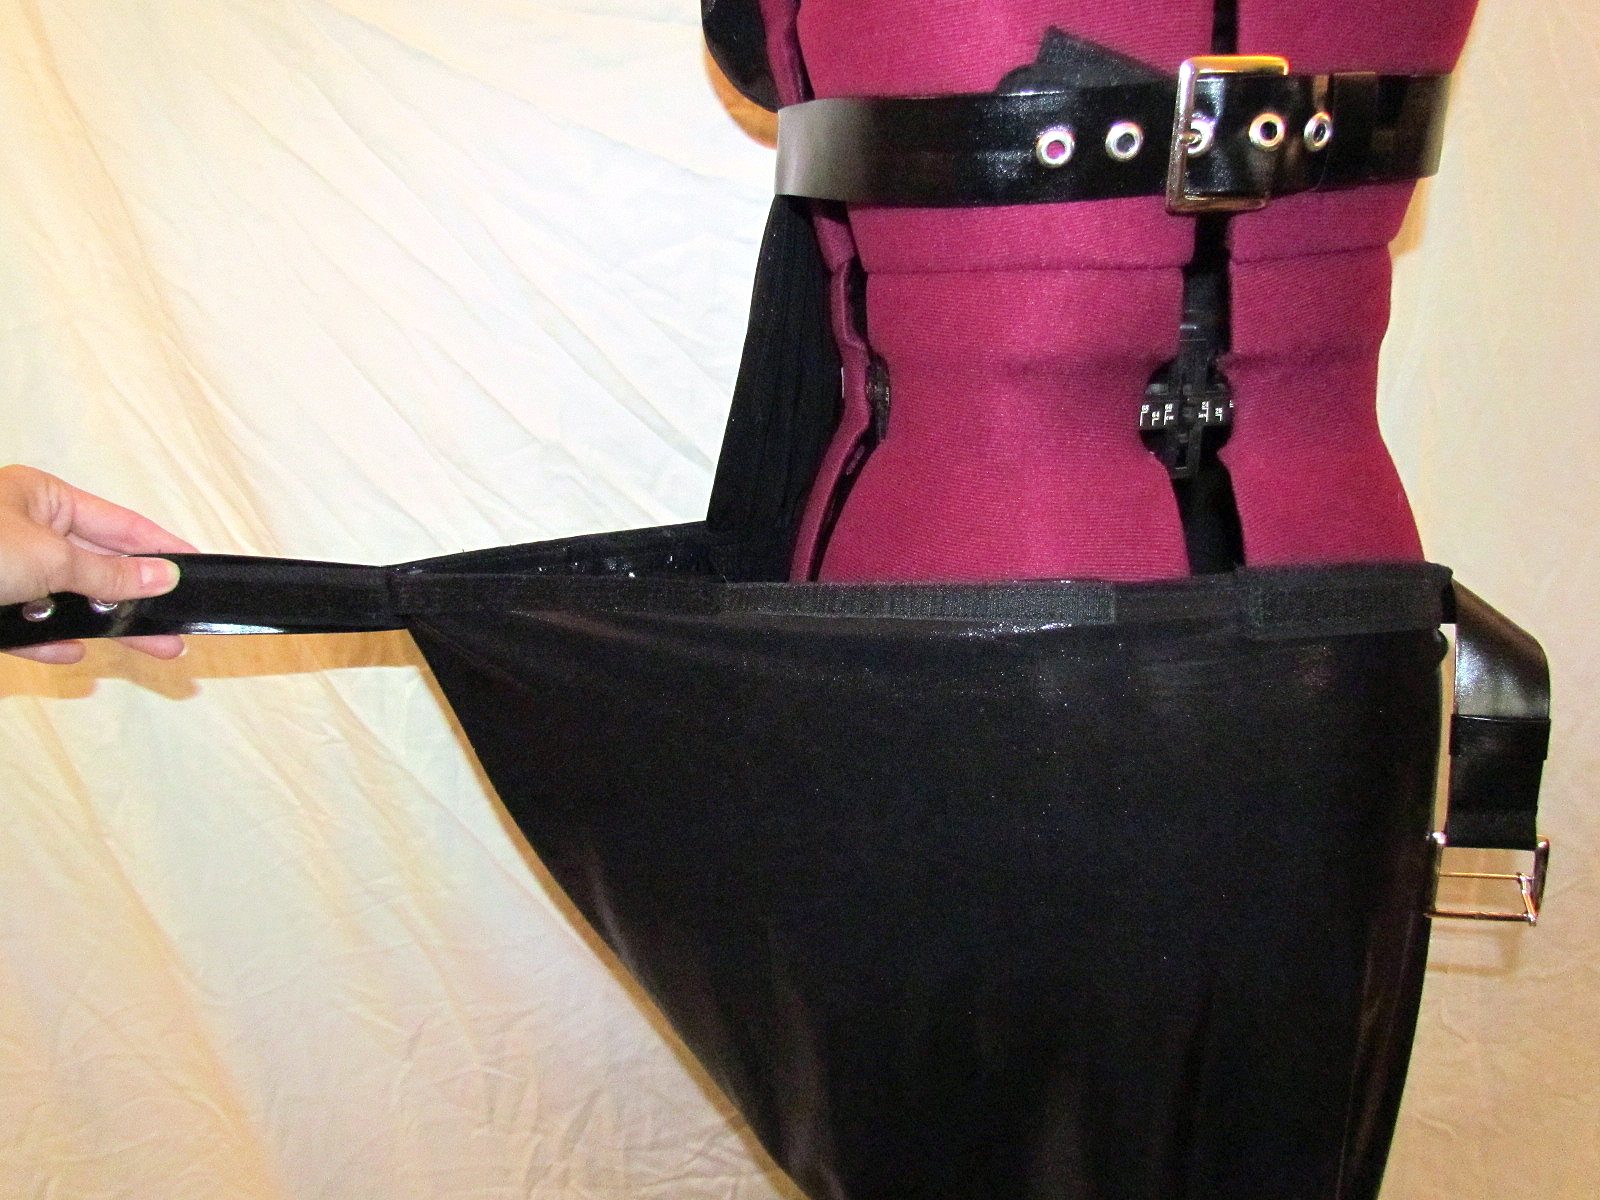
Once the velcro is secured and the leather belting is buckled it looks pretty good! The regular belting coved the mock belting perfectly.
For the bottom of the skirt I basically just draped the black shimmer fabric around the front and back and made it wrap just a little bit on the right side. I attached that to the mock belting and then draped the snakeskin fabric over top of it to cover up the slit. This way Allison could actually walk in the outfit. After attaching the top of the snakeskin fabric I draped it over towards her left side and attached it to the mock belting. Lastly I added on the leather belting to cover everything up!
I think that pretty much sums up what all I did to make this cosplay outfit. I am really proud of how it turned out! Since making this I’ve done a few other garments for friends. It’s always intimidating but it’s also very reassuring when you can accomplish a task like this!
Allison added her own accessories to really showoff the idea:
Looks great! I love watching and seeing cosplay 😀
Thanks! Sometimes I feel like I do better on projects that have no pattern and I need to just wing it. At least, that’s when I feel most creative!